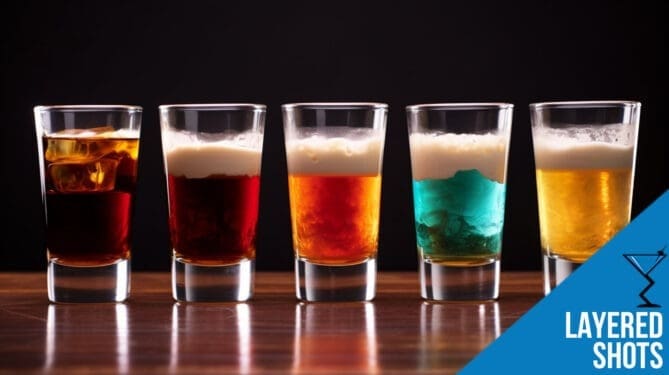
A Mixologist’s Guide to Pouring Layered Shots
Layered shots, a staple at any vibrant bar scene, are not just about taste; they’re a visual spectacle. These multicolored marvels are a testament to a mixologist’s precision and flair. But don’t be daunted – with the right technique and a bit of practice, anyone can master this art.
Understanding the Science Behind Layered Shots
The secret to perfect layering lies in understanding specific gravity – a concept that might sound like it’s straight out of a physics textbook. In simpler terms, it’s all about the density of liquids. Each liquid’s weight determines whether it will float on top or sink to the bottom when poured into a glass. For instance, syrups, due to their sugar content, are denser and settle at the bottom, while certain spirits, being lighter, float on top.
A handy list of common liquors and mixers, categorized by their density, can be your best friend here. It’s like having a cheat sheet: knowing that Grenadine is heavier than Baileys, which in turn is heavier than Cointreau, is invaluable.
Essential Tools for Perfect Layering
Precision is key, and the right tools make all the difference. A bar spoon, with its long handle and shallow bowl, is perfect for gently pouring liquids. Alternatively, a pourer or a small measuring cup can also do the trick. The choice of glassware is equally important. A narrow, tall shot glass is ideal as it accentuates the layers.
list of common liquors and mixers categorized by their density is essential for any mixologist looking to master the art of layered shots. Here’s a guide that can help you understand which liquors and mixers will float, sink, or blend in your creations:
High-Density (Heavier Liquids)
These will generally form the base layer of your shots.
- Grenadine: A sweet, red syrup made from pomegranates.
- Crème de Cassis: A dark, sweet liqueur made from blackcurrants.
- Baileys Irish Cream: A creamy liqueur made from whiskey and cream.
- Kahlua: A coffee-flavored liqueur with a rich, syrupy consistency.
- Crème de Menth: A sweet, mint-flavored liqueur.
- Blue Curacao Syrup: The non-alcoholic, syrup version of Blue Curacao.
- Honey Syrup: A thick syrup made by diluting honey with water.
- Simple Syrup: A basic syrup made from sugar and water.
Medium-Density (Intermediate Liquids)
These can either float on high-density liquids or sink beneath low-density ones.
- Triple Sec: An orange-flavored liqueur.
- Amaretto: A sweet, almond-flavored liqueur.
- Crème de Banana: A banana-flavored liqueur.
- Peach Schnapps: A sweet, peach-flavored liqueur.
- Sloe Gin: A red liqueur made with gin and sloe (blackthorn) drupes.
- Midori: A bright green, melon-flavored liqueur.
- Crème de Noyaux: A pink, almond-flavored liqueur.
- Blue Curacao: An orange-flavored liqueur, colored blue.
Low-Density (Lighter Liquids)
These will generally float on top of other layers.
- White Rum: A light, clear rum.
- Vodka: A clear spirit, typically with a neutral flavor.
- Gin: A clear spirit known for its juniper flavor.
- Tequila Blanco: A clear, unaged tequila.
- Cointreau: A type of Triple Sec, clear and slightly less sweet.
- Whiskey: Depending on the type, it can be light enough to float.
- Absinthe: A potent, green spirit known for its anise flavor.
- Everclear: A very high-proof, clear spirit.
Tips for Layering
- Always pour the heaviest liquid first.
- Use a bar spoon or the back of a spoon to gently pour the next layer.
- Practice makes perfect. Don’t be discouraged by initial mistakes.
Remember, the specific gravity of alcoholic beverages can vary slightly based on brand and formulation, so this list should be used as a general guide. Experimentation and practice are key to mastering the art of layering in mixology.
Step-by-Step Guide to Pouring Layered Shots
1. Start with the Heaviest Liquid
Begin by pouring the densest liquid first. Aim to fill about one-third of the shot glass. A pro tip is to pour the liquid against the side of the glass, which helps in reducing splashing and keeps the layer neat.
2. The Slow Pour
For the second layer, place the back of a spoon against the inside of the glass, just above the first layer. Slowly pour the next layer over the back of the spoon. The spoon acts as a barrier, breaking the fall of the liquid and allowing it to gently sit on top of the first layer without mixing.
3. Repeat for Additional Layers
Continue the process with the next heaviest liquid. Remember to use the spoon to gently layer it on top. The key is to maintain a steady hand and pour slowly to achieve distinct layers.
4. Patience is Key
Rushing the process can cause the layers to mix, which defeats the purpose of a layered shot. Take your time with each pour, ensuring each layer is distinct and clear.
Common Mistakes to Avoid
- Pouring Too Fast:
This is the most common error. A slow, steady pour is crucial for maintaining distinct layers.
- Incorrect Order:
Always start with the heaviest liquid. Mixing up the order will result in the layers blending together. - Not Using the Right Tools:
Using a regular spoon or an incorrect glass can make layering more challenging. A bar spoon is ideal due to its long handle and small bowl.
Creative Ideas and Variations
Once you’ve mastered the basics, it’s time to get creative. Here are some ideas to inspire your layered shot creations:
- Themed Shots:
Create shots that match the theme of your event. For example, a patriotic red, white, and blue layered shot for the Fourth of July. - Color Play:
Experiment with different color combinations. You can create visually stunning shots using contrasting colors. - Flavor Experimentation:
Mix and match flavors. For instance, a sweet grenadine base, a creamy middle layer, and a strong spirit on top can create a delightful taste experience. - Seasonal Layers
: Adapt your shots to the seasons. Think about using warm, spiced flavors in the winter and bright, fruity layers in the summer. - Signature Shots:
Develop your signature shot that showcases your creativity and mixology skills. This could become a crowd favorite at your events.
Remember, the art of pouring layered shots is as much about patience and practice as it is about creativity. Each shot you make is an opportunity to refine your technique and impress your guests with your mixology prowess.
The Art of Layering – Mastering Layered Shot Recipes
Unleash your inner mixologist with 'The Art of Layering: Mastering Layered Shot Recipes' – a


