Advanced Mixology Techniques
Ever wondered what makes a cocktail go from good to ‘Wow, what’s in this?’ It’s all in the secret techniques that we mixologists love to play with. Today, I’m going to let you in on some of these game-changing tricks. Get ready to shake, stir, and sip your way to mixology mastery!
This isn’t just about mixing drinks; it’s about infusing your personality into every glass, crafting a cocktail that’s as unique as you are. Let’s embark on this flavorful adventure and discover the joy of creating a drink that speaks your language.
Jump to:
- Technique 1: The Perfect Ice
- Technique 2: Layering Drinks
- Technique 3: Infusing Your Own Spirits
- Technique 4: Smoking Cocktails
- Technique 5: Molecular Mixology
- Technique 6: Mastering the Stir
- Technique 7: Artful Garnishing
- Technique 8: Balancing Flavors
- Technique 9: Advanced Shaking Techniques
- Technique 10: Creating Signature Cocktails
Technique 1: The Perfect Ice
Why Ice Matters
Alright, let’s talk ice. It’s not just frozen water; it’s the secret agent in your cocktail. Ice can make or break a drink, and here’s how to make it your best friend in mixology.
-
Clear Ice: This is the James Bond of ice – sleek, stylish, and totally cool. Clear ice melts slower, which means less dilution and more time to enjoy your drink. The trick? Boil the water first, then let it cool and freeze. I remember the first time I used clear ice at a party. Everyone was asking if I had some sort of magic freezer. It’s that impressive!
-
Crushed Ice: Think of crushed ice as the life of the party. It’s perfect for those refreshing summer cocktails like mojitos or mint juleps. You can crush ice using a Lewis bag and mallet or, if you’re like me and enjoy a good kitchen hack, just wrap it in a clean tea towel and give it a good whack with a rolling pin. It’s a great stress reliever, and your drink will thank you for it.
-
Ice Spheres: These are the showstoppers. Ice spheres have more volume but less surface area, which means they melt super slowly. They’re perfect for your whiskey or Scotch on the rocks. I once had a guest who was so fascinated by the ice sphere in his drink that he spent more time looking at it than drinking his cocktail!
-
Fun Shapes: Don’t be afraid to play around. I’ve used star-shaped ice in a Fourth of July cocktail, and it was a hit. You can find ice molds in all sorts of fun shapes online. It’s a simple way to add a wow factor to your drinks.
Remember, ice isn’t just about keeping your drink cold; it’s about enhancing the entire cocktail experience. Whether you’re going for style, functionality, or a bit of both, the right ice can elevate your mixology game to new heights. So next time you’re prepping for a cocktail session, give your ice a little extra thought – it’s the cool detail that can make your drink a masterpiece. Cheers to that!
Technique 2: Layering Drinks
The Art of Layering
Layering drinks is like being a liquid artist – it’s all about creating a visual spectacle in a glass. Let’s dive into how you can turn your cocktails into layered masterpieces.
-
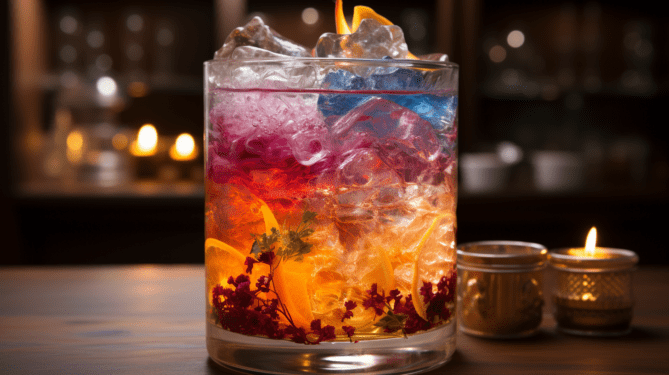
Understanding Density: The secret to perfect layering is understanding the density of liquids. Think of it as a cocktail pool party – the denser guests (heavier liquids) hang out at the bottom, while the lighter ones float on top. A good rule of thumb: the higher the sugar content, the heavier the liquid.
-
The Right Tools: A spoon is your magic wand here. Use the back of a spoon to gently pour each layer. This technique helps to spread the liquid slowly over the previous layer without mixing them. I once used a regular kitchen spoon at a friend’s party to layer a Black and Tan, and it turned into a mini mixology class with everyone wanting to try it!
-
Practice Makes Perfect: My first layered cocktail was a bit of a mess – more of a tie-dye than a neat layer. But with practice, I started nailing those Instagram-worthy layers. Start with simple two-layer drinks, like a classic Pousse Café, and work your way up.
-
Color and Contrast: Play with colors for that wow factor. Imagine serving a drink with a sunset gradient or patriotic layers on the Fourth of July. I remember creating a Halloween-themed layered shot that looked like a spooky sunset – it was the talk of the evening!
-
Temperature Matters: Cold liquids are denser than warm ones. If you’re using a mix of temperatures, start with the coldest layer first. It’s a neat trick that can help keep those layers distinct.
Layering drinks is not just about the taste; it’s about creating an experience. It’s a conversation starter and a showstopper. So next time you’re mixing drinks, try adding a layered twist. Who knows, you might just create the next big hit at your cocktail party. Here’s to raising the bar – one layer at a time!
Technique 3: Infusing Your Own Spirits
Homemade Infusions
Welcome to the world of spirit infusions, where your home bar turns into a flavor laboratory! Infusing spirits is like giving your cocktails a personal signature. Let’s get into how you can become a master infuser.
-
Choosing Your Base: Vodka is the blank canvas of the spirits world – it’s perfect for infusions. But don’t stop there. I’ve infused everything from rum with pineapple to bourbon with vanilla. One of my favorites? Gin infused with Earl Grey tea – it’s a game-changer for your Gin and Tonics.
-
Picking Your Ingredients: This is where you can get creative. Fruits, herbs, spices, even candy – the sky’s the limit. Remember, fresh is best. I once infused vodka with fresh strawberries and basil for a summer party, and it was a hit. The key? Let it sit for a few days to a week, and you’ve got a custom infusion that’ll impress any guest.
-
The Infusion Process: It’s simpler than it sounds. Just add your ingredients to the spirit, seal it in a jar, and let it sit. Shake it gently every day to mix the flavors. I like to taste it periodically – it’s like watching a painting come to life, but with flavors.
-
Straining is Key: Once you’re happy with the flavor, strain it. I learned the hard way that leaving the ingredients in too long can lead to some… interesting flavors. A fine mesh strainer or cheesecloth works wonders.
-
Experiment and Enjoy: The best part about infusions is the experimentation. I remember making a chili-infused tequila that was so popular, my friends still ask for it at gatherings. Don’t be afraid to try something new – you might just create your next signature drink.
Infusing your own spirits is not just about the flavors; it’s about the fun and creativity that goes into each bottle. It’s a conversation starter and a way to add a personal touch to your cocktails. So, grab a jar, pick your ingredients, and start infusing! Who knows, your next infusion might just be the star of your next cocktail party. Cheers to that!
Technique 4: Smoking Cocktails
Smoky Whispers in Your Glass
Welcome to the smoky side of cocktails, where we add a little drama to your drink! Smoking cocktails is like adding a mysterious character to your cocktail story. It’s not just about flavor; it’s about creating an experience. Let’s light up the stage!
-
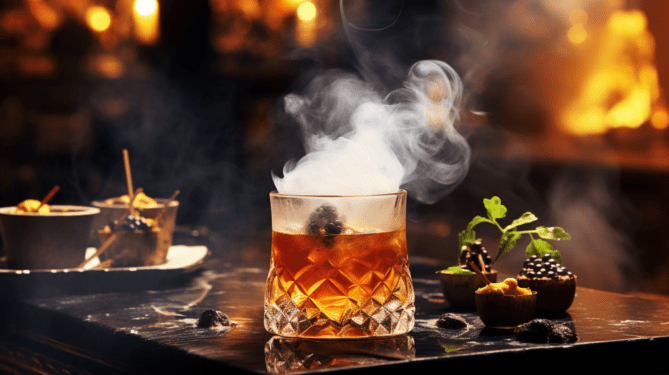
Choosing Your Smoke: Different woods offer different flavors. Applewood gives a sweet touch, while mesquite brings a robust intensity. I once used cherry wood to smoke a Manhattan for a themed party, and it was like watching a magic show – the guests were mesmerized by the swirling smoke!
-
The Smoking Tools: You don’t need fancy equipment. A smoking gun, a handheld smoker, or even a lit cinnamon stick can do the trick. Safety first, though! I remember my first attempt with a DIY smoker – let’s just say it’s a miracle my eyebrows survived. Stick to professional tools or simple, safe methods.
-
The Smoking Process: It’s simpler than it sounds. Trap the smoke in the glass or shaker before pouring the drink. The smoke clings to the surfaces, infusing the cocktail with a delightful aroma. The first time I smoked a cocktail, the room filled with an enchanting aroma, turning heads and sparking curiosity.
-
Pairing Flavors: Smoky flavors pair well with dark spirits like whiskey or rum. But don’t be afraid to experiment. A smoked margarita? Absolutely! It’s like adding a plot twist to a classic story.
-
The Showmanship: Smoking a cocktail isn’t just about taste; it’s a visual spectacle. The swirling smoke, the anticipation, the reveal – it’s all part of the experience. I’ve seen guests whip out their phones to capture the moment. It’s not just a cocktail; it’s a performance.
Smoking cocktails is about adding a layer of sensory delight to your mixology. It’s a conversation starter, an icebreaker, and a showstopper all rolled into one. So next time you’re looking to add a little flair to your cocktail evening, why not add some smoke to the mix? Here’s to raising a glass to smoky sophistication!
Technique 5: Molecular Mixology
Cocktail Science at Its Finest
Welcome to the fascinating world of molecular mixology, where cocktails meet science and magic happens! This is where you get to be a mad scientist behind the bar, creating concoctions that not only taste amazing but also look out-of-this-world. Let’s dive into this exciting world.
-
The Basics of Molecular Mixology: It sounds like rocket science, but it’s really about playing with textures and presentations. Think of it as giving your cocktails a sci-fi makeover. I started with something simple like a foam topping on a classic cocktail and it felt like I was wearing a lab coat instead of a bartender’s apron!
-
Creating Foams and Gels: Foams can add a luxurious texture to your drinks. Using something like a cream whipper, you can top your cocktails with a light, flavorful foam. I remember making a lemon foam for a gin fizz and watching my friends’ eyes light up with surprise at their first sip. Gels, on the other hand, can add a fun, jiggly element to your drinks. Agar-agar is a great tool for this.
-
Spherification: This is where you can really wow your guests. Turning liquid into caviar-like spheres that burst in your mouth is a showstopper. My first attempt at spherification turned my kitchen into a bit of a science lab, but the result was a cocktail that looked like it came straight out of a gourmet restaurant.
-
Playing with Temperatures: Ever tried a hot gel or a frozen foam? Playing with temperatures can add an unexpected twist to your drinks. I once served a cocktail with a frozen foam that slowly melted into the drink, changing the flavor profile as you sipped. It was like two drinks in one!
-
The Element of Surprise: Molecular mixology is all about surprising your guests. It’s not just about drinking; it’s about experiencing. The first time I served a molecular cocktail at a party, it sparked so many conversations. It wasn’t just a drink; it was the highlight of the night.
Molecular mixology is a playground for creativity. It allows you to transform ordinary cocktails into extraordinary experiences. Whether it’s a foam, a gel, or a sphere, each element you add brings a bit of magic to the glass. So, put on your mixologist lab coat and start experimenting. Who knows what delicious concoctions you’ll come up with! Cheers to science in your glass!
Technique 6: Mastering the Stir
Stirring: The Unsung Hero of Cocktails
Welcome to the subtle art of stirring, the quiet yet crucial technique in the cocktail world. Stirring might not have the flair of shaking, but it’s just as important for crafting the perfect drink. Let’s stir things up a bit!
-
Why Stirring Matters: Stirring is all about delicacy and precision. It’s perfect for cocktails where clarity and smoothness are key. Think of it like gently rocking a boat rather than causing a storm. I once stirred a Martini for a discerning guest who claimed he could taste the difference if it was shaken – he wasn’t wrong!
-
The Technique: It’s more than just swirling a spoon around. The goal is to chill and dilute the drink without adding air. Hold the spoon between your fingers and move it in a smooth, circular motion, as if you’re drawing circles in the glass. I like to imagine I’m an artist, and each stir is a brushstroke on my liquid canvas.
-
The Right Tools: A long, slender bar spoon is your best friend here. It’s designed to reach the bottom of tall mixing glasses and move smoothly. The first time I used a proper bar spoon, it felt like I’d been given a magic wand – the difference in my stirring game was night and day.
-
Temperature and Dilution: Stirring allows for more control over the temperature and dilution of the drink. You want to chill the drink while maintaining its strength and texture. It’s a balancing act – like trying to walk a tightrope without falling off.
-
The Zen of Stirring: There’s something almost meditative about stirring a cocktail. It’s a moment of calm in the hustle and bustle of a busy bar. I’ve found that taking the time to stir properly not only improves the drink but also gives me a moment of peace in my day.
Mastering the stir is a skill that elevates your cocktail craft. It’s about understanding the character of the drink and respecting the ingredients. So next time you’re making a cocktail that calls for a stir, take a moment to enjoy the process. It’s not just about mixing a drink; it’s about creating a moment of perfection in a glass.
Technique 7: Artful Garnishing
Garnishing: The Cocktail’s Crown
Welcome to the world of garnishing, where your cocktail gets to dress up and show off! Garnishing is not just an afterthought; it’s the final, crucial touch that can elevate your drink from good to unforgettable. Let’s dive into the art of garnishing with some fun and flair!
-
The Importance of Garnishing: Think of garnishes as the accessories of the cocktail world. Just like a well-chosen necklace can make an outfit, the right garnish can complete a drink. I once served a simple gin and tonic with a sprig of rosemary and a twist of lemon, and it transformed the drink into something special. It’s all about adding that extra touch of magic.
-
Choosing Your Garnish: The key is to complement the flavors in the drink. Citrus peels are great for adding a zesty aroma, while herbs can bring freshness and depth. And don’t be afraid to get creative! I remember using a flaming orange peel for an Old Fashioned, and it not only added a smoky flavor but also some serious wow factor.
-
Technique Matters: There’s an art to preparing garnishes. When peeling citrus, try to get just the zest without the bitter white pith. With herbs, a gentle slap between your hands can release their aromatic oils. I learned this trick at a cocktail workshop, and it’s been a game-changer in bringing out the herb’s fragrance.
-
Presentation is Key: How you place the garnish can make a big difference. Floating a delicate flower on top of a cocktail or artfully placing a citrus twist can turn your drink into a work of art. I once created a cocktail garnished with a small edible flower garden on top – it was almost too pretty to drink!
-
Garnishes as Conversation Starters: A unique garnish can be a great conversation starter. I’ve used everything from candied ginger to bacon strips, and each time, it sparked interest and curiosity. It’s a fun way to engage with your guests and add a personal touch to their drinking experience.
Garnishing is where your creativity can shine in mixology. It’s not just about making a drink look good; it’s about enhancing the overall experience. So next time you mix up a drink, take a moment to think about the garnish. It’s your chance to add a personal signature and make your cocktail truly stand out.
Technique 8: Balancing Flavors
The Art of Flavor Equilibrium
Welcome to the balancing act of cocktail making, where the magic lies in finding the perfect harmony of flavors! Balancing flavors in a cocktail is like being a conductor of an orchestra, where each ingredient plays a crucial role in creating a symphony in a glass. Let’s explore how to strike that delightful balance.
-
Understanding Flavor Profiles: The key to balance is understanding the basic flavor profiles – sweet, sour, bitter, and salty. It’s like cooking; you need the right mix of ingredients to create a dish that sings. I remember my first attempt at a Whiskey Sour; I was a bit heavy-handed with the lemon. It was more pucker than pleasure! But with practice, I learned the delicate dance of sweet and sour.
-
Tasting as You Go: This is crucial. Always taste your cocktail before serving. It’s like peeking into the oven to check on a cake. You can adjust as needed – maybe a bit more syrup for sweetness, or a dash more citrus for acidity. I’ve found that even the smallest tweak can turn a good cocktail into a great one.
-
Experimenting with Syrups and Bitters: Homemade syrups and bitters can be game-changers. They add complexity and depth. I once made a rosemary syrup that added a whole new dimension to a classic gin fizz. And don’t get me started on bitters – they’re like the spice rack of the cocktail world.
-
The Role of Ice and Dilution: Ice isn’t just for chilling; it also dilutes the drink, which can help mellow strong flavors. The right amount of dilution can be the difference between a cocktail that’s too strong and one that’s just right. I learned this the hard way at a summer BBQ, where my cocktails were a hit at first but became too potent as the ice melted quickly in the heat.
-
Personal Preferences Matter: Remember, balance can be subjective. What’s perfectly balanced for one person might be too sweet or too sour for another. I always ask my guests if they have a preference. It’s like being a flavor DJ, tweaking the mix to get the vibe just right.
Balancing flavors in cocktails is an art form. It’s about understanding the ingredients, trusting your palate, and being open to experimentation. Each cocktail you make is an opportunity to create a unique flavor experience. So go ahead, play with flavors, and find your perfect balance. Here’s to crafting cocktails that not only taste great but also sing with balanced harmony!
Technique 9: Advanced Shaking Techniques
Shaking Up the Cocktail Game
Welcome to the dynamic world of advanced shaking techniques, where your cocktail shaker becomes a dance partner! Shaking a cocktail isn’t just about mixing ingredients; it’s a performance, an expression of passion for the craft. Let’s shake things up with some flair and finesse!
-
Understanding the Basics: Before diving into advanced techniques, mastering the basic shake is key. It’s all about a firm grip and a rhythmic motion. I remember my first cocktail shake – it was more of an awkward jiggle than a shake. But with practice, I found my rhythm, and shaking became second nature.
-
The Hard Shake: Invented by Japanese bartenders, the hard shake is a thing of beauty. It’s a vigorous, aerating shake that creates a silky texture in the drink. The first time I tried it, I felt like a drummer in a rock band – it’s energetic, intense, and incredibly fun.
-
The Double Shake: This involves shaking two shakers at once – talk about a workout! It’s great for busy nights when you’re juggling multiple orders. I once had a challenge with a fellow bartender on who could double shake the fastest. It was a hilarious spectacle and a great crowd-pleaser.
-
Shaking with Style: Adding a bit of flair to your shake can be a real crowd-pleaser. A spin of the shaker, a toss from hand to hand – it’s like adding a dash of personality to each drink. I’ve dropped a shaker or two in my time, but when you nail that perfect flair move, it feels like hitting a home run.
-
The Importance of Ice: The type and amount of ice can change the game. Large cubes or spheres offer less dilution, while smaller cubes create a more chilled drink. I experimented with different ice shapes and sizes and found that each brings a unique character to the drink.
-
Listening to the Shaker: This might sound strange, but the shaker will ‘tell’ you when the drink is ready. The sound changes as the ice breaks down and the drink reaches the right temperature. It’s like the shaker is whispering, “I’m ready.”
Advanced shaking techniques are not just about mixing a drink; they’re about adding excitement and flair to the cocktail-making process. It’s a way to engage with your guests and show off your skills. So next time you pick up a shaker, remember: you’re not just a bartender, you’re a performer.
Technique 10: Creating Signature Cocktails
Crafting Your Cocktail Legacy
Welcome to the creative and rewarding journey of creating signature cocktails, where you get to leave your personal mark on the cocktail world! Designing a signature drink is like painting on a blank canvas; it’s an expression of your personality, experiences, and tastes. Let’s mix up some magic and create a cocktail that’s uniquely yours!
-
Finding Inspiration: Inspiration can come from anywhere – a memorable meal, a favorite scent, even a special moment. My journey to creating a signature cocktail began with a dessert I had on vacation – a delectable lemon basil sorbet. That flavor combination stuck with me and eventually evolved into a refreshing lemon basil martini that became a hit among my friends.
-
Balancing Flavors: This is where your mixology skills really shine. Think about the flavor profile you want to achieve. Do you want it sweet, sour, bitter, or a mix? I spent weeks tweaking the proportions of lemon and basil in my martini, playing with different sweeteners and spirits until it tasted just right.
-
Choosing a Theme or Story: A great signature cocktail tells a story or reflects a theme. Maybe it’s a drink that captures the essence of your hometown or a concoction that represents a significant life event. I once created a cocktail for a friend’s wedding, incorporating ingredients that represented the couple’s heritage – it was a beautiful, personal touch to their celebration.
-
Experimenting with Unique Ingredients: Don’t be afraid to step outside the box. Unusual ingredients can set your cocktail apart. I experimented with everything from homemade syrups to exotic spices. The key is to keep the flavors balanced and accessible.
-
The Name is Everything: A catchy, memorable name can make your cocktail stand out. The name should evoke curiosity and give a hint of what to expect. I named my lemon basil martini ‘The Citrus Whisperer,’ which sparked intrigue every time someone ordered it.
-
Presentation and Garnish: The visual appeal of your cocktail is just as important as the taste. Think about glassware, garnishes, and even the color of the drink. For ‘The Citrus Whisperer,’ I used a thin basil leaf and a twist of lemon peel for a simple yet elegant presentation.
Creating a signature cocktail is a journey of exploration and creativity. It’s a chance to share a piece of yourself with every sip. Whether it’s for your personal enjoyment or for your guests, a signature cocktail is a testament to your passion for mixology. So go ahead, mix, taste, and tweak. Your signature cocktail is not just a drink; it’s a story in a glass, waiting to be told. Cheers to your cocktail creation!
Raising a Glass to Your Mixology Journey
As we wrap up this exciting journey into the world of creating signature cocktails, remember that each drink you craft is a testament to your creativity and passion for mixology. Your signature cocktail is more than just a blend of ingredients; it’s a personal story, a piece of art, and a reflection of your journey in the world of flavors.
If you’ve enjoyed this journey, don’t stop here. There’s a whole world of mixology to explore. Check out our other articles for more tips, techniques, and recipes. From mastering the art of shaking to exploring exotic ingredients, there’s always something new to learn and try.
Exploring the World of the Old Fashioned – Variations of a Classic Cocktail
Discover the art of the Old Fashioned with this guide to its many variations, from
35 Easy Cocktail Recipes: Perfect for Your Next Party
Explore 35 easy cocktail recipes for your next party! From Pina Coladas to Manhattans, prepare
Best Bourbon for Beginners: What to Try First
Discover the best bourbon for beginners with our top picks. From Buffalo Trace to Maker's
Eggnog Cocktails & Drinks
Discover the best eggnog cocktails and drinks for the holiday season! From classic recipes to


